
Wednesday, January 30, 2008
Monday, January 28, 2008
In the Gnudi

This month's issue of Martha Stewart Living has a whole section on dumplings from all over the world. I love dumplings! What's not to love. Anyway, I'd like to make them all. I started with the gnudi from Italy. Most google searches about gnudi turn up the same description...they are like ravioli filling without the pasta. Martha's gnudi are made with ricotta and spinach and parmesan cheese...this seems to be the most common way. Of all the dumpling recipes featured, this one seemed the most accessible for a weeknight dinner...no dough to make, no wrapping to do...just little lumps of goodness. So I got to it. Here's the recipe...not verbatim, but nearly. I used the easier to find corn meal instead of thier recommended semolina for dusting. I also used part skim ricotta instead of fancy schmancy fresh whole ricotta.
Spinach Ricotta Gnudi
1 ½ lb. fresh spinach, large stems removed, washed well
2 large egg yolks lightly beaten
¾ cup ricotta cheese, drained for 30 min in a fine sieve
¾ cup finely grated Parmesan cheese
1 cup plus 2 Tablespoons AP flour
½ tsp. fresh grated nutmeg
Coarse salt & fresh pepper
Corn meal, for dusting
4 Tablespoons Unsalted butter
2 Tablespoons Roughly chopped sage leaves, plus about 8 whole leaves
1. Steam spinach until bright green…about 3-5 minutes. Drain and let cool slightly, then use a kitchen towel or cheesecloth to squeeze out any remaining liquid. You should have one scant cup of spinach. Puree in a food processor.
2. Stir together spinach puree, egg yolks, cheeses, 2 Tblsp flour, nutmeg, 1 tsp salt and pepper.
3. Mound 1 cup flour on a cutting board. Using floured hands gently shape 1 Tablespoon of the spinach mixture into a small log. Drop it into the flour and roll quickly to lightly coat. Transfer to a baking sheet that’s lightly coated with corn meal.
4. Boil the gnudi a half batch at a time, stirring gently to keep them from sticking together. Cook until gnudi rise, and remain on the surface.
5. Melt butter in a small skillet over medium heat. Add sage leaves and 1 ½ Tablespoon of gnudi cooking water, cook on low for 5 minutes, season with salt and pepper.

The flavors of this were great, however half of my gnudi fell apart into mush! I don't know if I didn't cook them long enough or if it had something to do with the lower fat content of my rocotta or what. These are very delicate dumplings. The ones that survived made for a very nice dinner. I loved the bright green coor of them. Wouldn't they be pretty with my Beet Gnocchi?!?!


As for the mush...I couldn't let it go to waste! It still tasted good no matter what form it ended up. So I stirred in the rest of the sage butter and stuck it in the fridge for future use.
I intended to make ravioli. I broke out the ol' pasta machine, and had Jack give me a lesson in pasta-making. It's not hard, but it takes patience. It's sooo worth it, though. We made whole wheat pasta using this recipe. We did have to add some water to make it work, just as someone comments on allrecipes. Once we had it rolled out into sheets, we contemplated stuffing and shaping and cutting. Jack pulled out a round glass and used that as a cutter.

He made a little tortellini, and it looked so cute and was so easy that we decided to do those instead of ravioli. Tortellini have a much more satisfying chewyness than ravioli anyway. I keep saying tortellini, but upon further review, Jack thinks we ended up making Cappelletti, or "little hats." It's a slight difference between the two. Tortellini are more ring-like...said to be inspired by Venus' belly button. I can't find much about different stuffed pasta shapes on-line except this handy-dandy guide to pasta shapes.

Each "whateverini" had about a teaspoon of filling in it.

We spread some water along the rim of the circle, then folded it in half over the filling, pushing as much air out as possible.

Gather the tips in and pinch together. Voila! A delicious little hat!


Whatever we made, they were good. The smooshed gnudi made a perfect filling, and the fresh pasta? Well, that's always a pleasure. I made more sage butter to go on top of them, as I really liked the way it went with the filling flavors.
Wednesday, January 23, 2008
Awesome apple pie, Awesome St. Louis bloggers
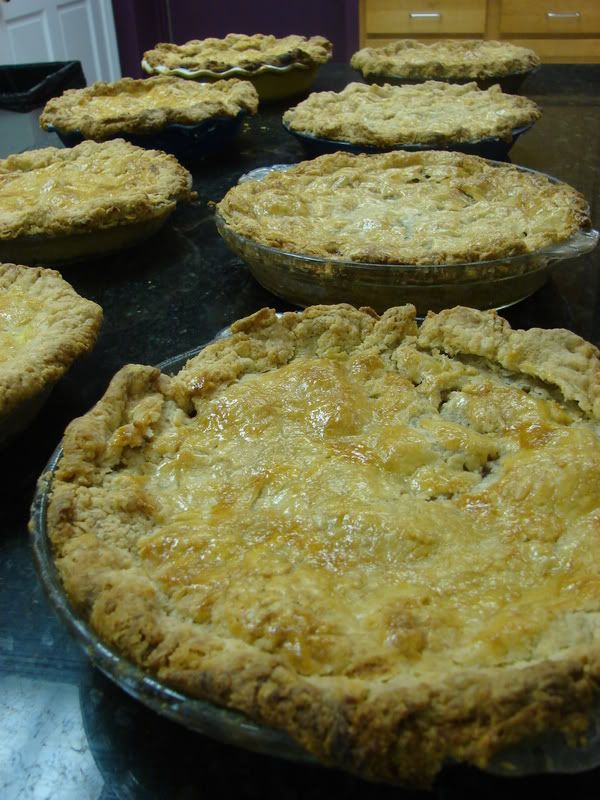
Today is National Pie Day. Not to be confused with Pi Day, which is March 14th (3/14...git it?). Though both Pie and Pi are things that tend to make my brain hurt a smidge. Baking?!?! Math?!?! Yikes!
Sunday I got over one of those brain challenges, at least. Alanna from A Veggie Venture arranged a gathering of St. Louis area food bloggers at the Kitchen Conservatory in Clayton. Anne, who writes the blog for Kitchen Conservatory, was sweet enough to teach us all how to make an awesome apple pie from scratch. Also, Christi from Response Builders was there to offer advice on search engine optimization. Thanks so much Ladies!!
Roll Call! The STL bloggers in attendance were; Stefani from Cupcake Project (who was very disappointed to find out that the "f" in iron stef is a farce...I actually spell my name with a "ph" but chose "f" because it was more like "chef" visually....), Karen from Family Style Food, Bruno from Bruno's Dream (who also has blogged this event here), Natalia from ZiNur, Joe and Ann from St. Louis Eats and Drinks, and, of course, Alanna from Veggie Venture.
We didn't hesitate to get our hands dirty...well we washed them first, actually, but you know what I mean. We got to the pie crust making! Anne was a great teacher...very high energy. She was on us, making sure we remembered the main rule..."Cold Dough, Hot Oven!" and other pie crust details. Here are some things I learned that were eye-opening:
-When you cut the butter in the final result should be about dime-size lumps. This seems big, but don't worry...It's RIGHT!
-When you add the ICE water, using a gravy separator is perfect for pouring the water in without the ice chunks.
-The water should barely make the "dough" stick together. You shouldn't knead the dough, nor should you handle it much at all. The idea is to press the water and the other ingredients together gently. There will be crumbs left at the bottom of the bowl...that's okay.
-To figure out how many apples you'll need for your pie...see how many whole apples fit in the pie dish you are using. Voila!
-Don't be shy with dusting the flour on your work surface and the crust you are rolling out. You can brush it off with a pastry brush.
-Butter!!! butter in the crust, of course, but also, dabs of butter on top of the apple filling. Yup.
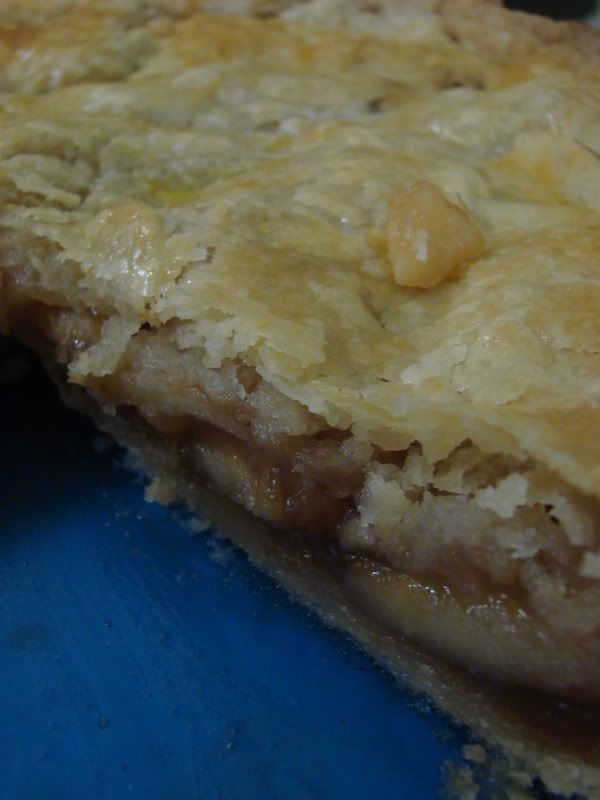
This Pie was good, people. REALLY good. The filling could have been less sweet, I think. I don't know who the heck put all that brown sugar in there *innocent puppy dog eyes* ...Anyway, the crust is crumbly and melt-in-your mouth. So good. Not too difficult to make, either. I will be requiring some new kitchen tools, though...Namely a pastry blender, a scraper thingy and a big Silpat. And perhaps a fairy duster...mainly for the name...
You can see the recipe and process for this wonderful pie-crust here on Alanna's other blog, Kitchen Parade. Also, Here is the whole apple pie recipe.
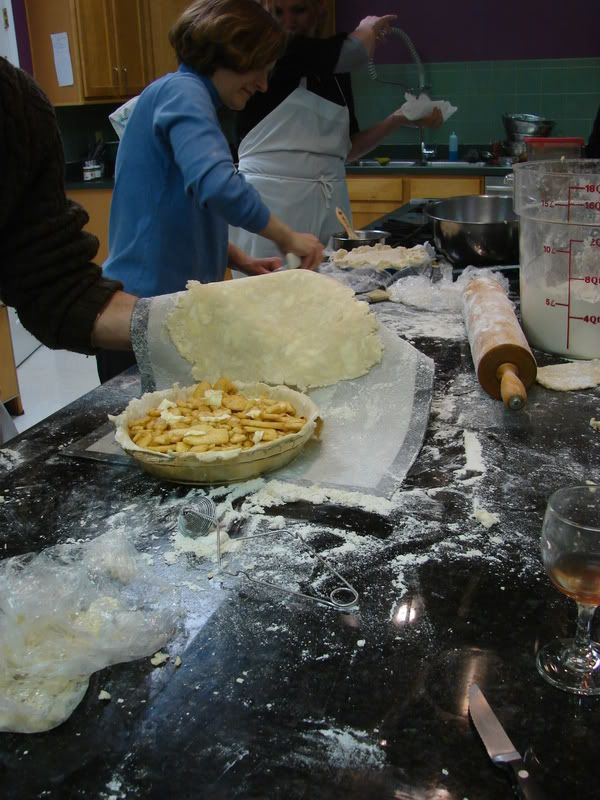
And with that, here are some photos of St. Louis bloggers hard at work:
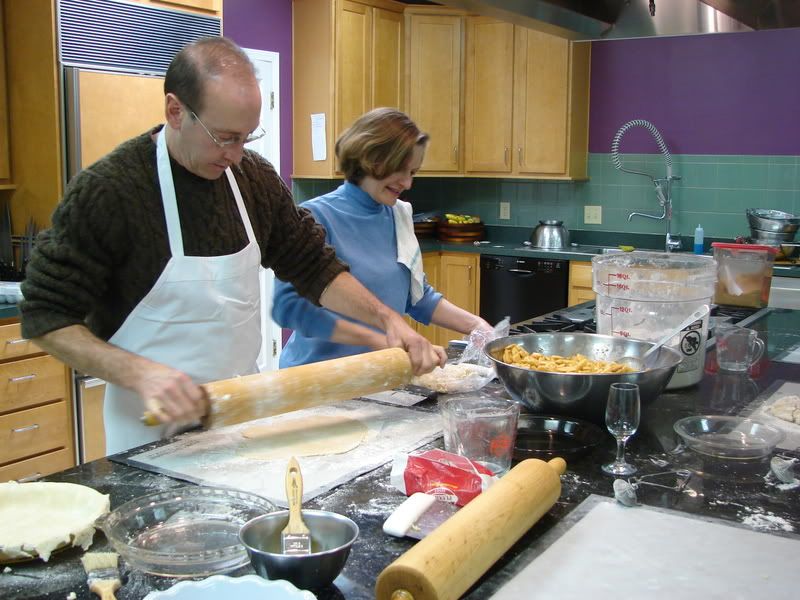
Bruno and Anne Rollin'
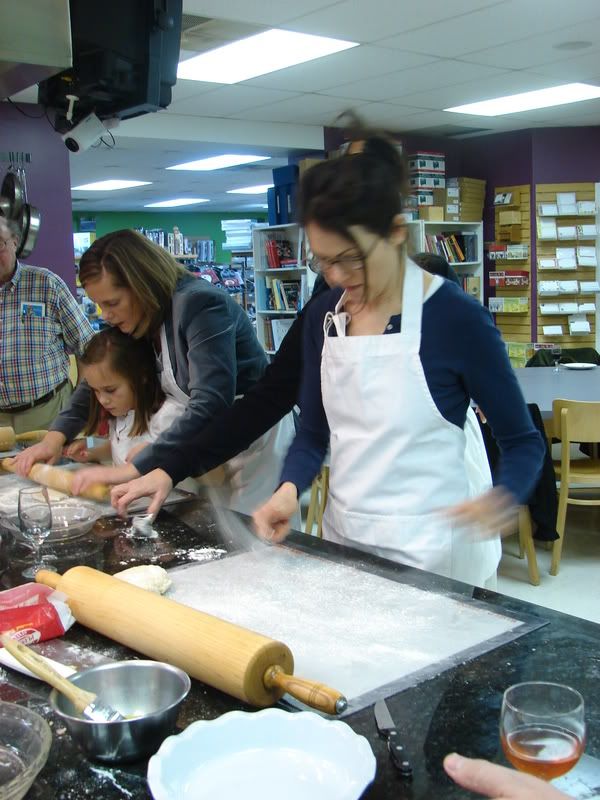
Karen sprinkles Fairy Dust!
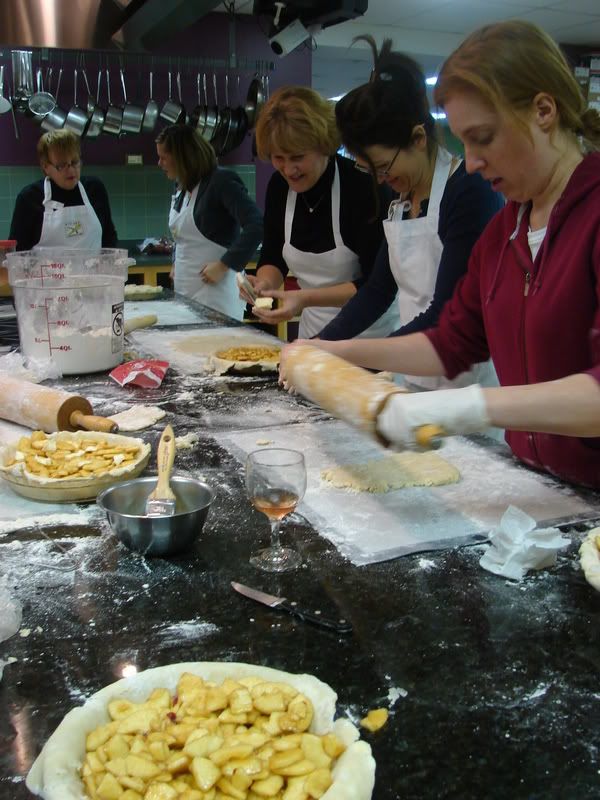
Stef, Karen, Alanna, Christi and Ann. Making a mess!

It's a plethora of pie pros!
Bruno flips!
It was great to meet all these other bloggers, finally. STL food bloogers rule! It was also great to learn such a wonderful skill, and to talk about the internets and the blogosphere with similar-minded people. I learned a lot, and got some new friends in the process.
lo bob! you have pie?
Tuesday, January 22, 2008
Shrimp & Polenta vs. Shrimp and Polenta

I had a roll of store-bought. I had some shrimp. I wanted them to unite, but I wasn't exactly sure what direction to go. Jack suggested a Shrimp Polenta Battle! We've done something similar with shrimp before, but not for the same night! Sounded fun to me.
Allez Cuisine!
Ironstef's dish:

Pepperoncini Shrimp with Pancetta and
a Balsamic Reduction over Polenta
-1/4 olive oil
-3 tablespoons minced pepperoncini
-4 cloves garlic-minced
-1/2 bag frozen shrimp (medium), thawed.
-4 slices pancetta.
-2 1/2 inch slices of polenta from a pre-made roll.
-Reduced balsamic vinegar: heat 1/4 cup of balsamic vinegar and 1 tsp. honey in sauce pan over med/high heat until reduced by more than half. It should be a syrup consistency.
1. Cook pepperoncini and garlic in olive oil for about 6 or 7 minutes. Taste and adjust flavor using salt and pepper. Set aside while you cook polenta and pancetta, to let the flavors infuse into the oil a bit more.
2. Cook Pancetta in a skillet until crispy. Remove pancetta and add the slices of polenta to the skillet (add some oilve oil to the pan if the drippings from the pancetta don't seem like enough to cook the polenta). Cook until well browned on both sides.
3. Add shrimp to pepperoncini oil and just heat through. Spoon shrimp and sauce over fried polenta disc, drizzle with balsamic reduction and garnish with the pancetta.

Challenger Jack's dish:
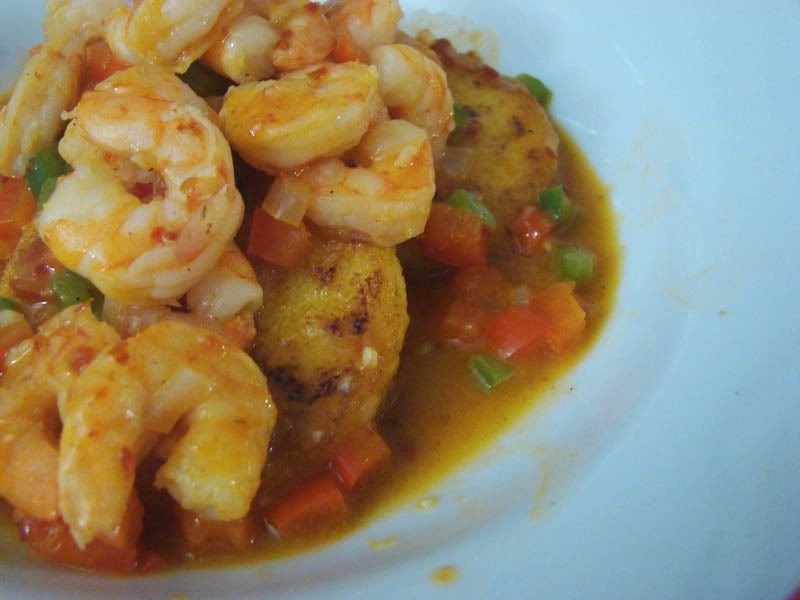
Honey Chipotle Shrimp
over Polenta
-2 tbsp minced garlic
-2 tbsp minced shallot
-1/3 cup red bell pepper, diced fine
-1/3 cup green bell pepper, diced fine
-2 tbsp olive oil
-1/2 chipotle pepper, seeds removed, minced
-1 tbsp adobo sauce
-Honey to taste (a teaspoon or 2)
-1/2 package frozen shrimp (medium)
-Salt
Sautee garlic and shallots in olive oil with a pinch of salt for 30-45 seconds. Add the chipotle pepper and adobo sauce. Add honey until you reach desired sweetness. Stir until heated through. Add frozen shrimp and cook until heated through. Remove shrimp and reduce remaining liquid until slightly thick. Return shrimp to heat and toss with the diced bell peppers. Heat through and serve on 1/2 inch polenta slices that have been fried in skillet with butter.

So who's cuisine reigned supreme? Well, we didn't actually score them or pick a winner. It was all in fun, and both were really really tasty. Next time, though, I'm springing for better shrimp. Frozen medium cooked shrimp are cheap for a REASON!
What would you do with the secret ingredients?
Monday, January 21, 2008
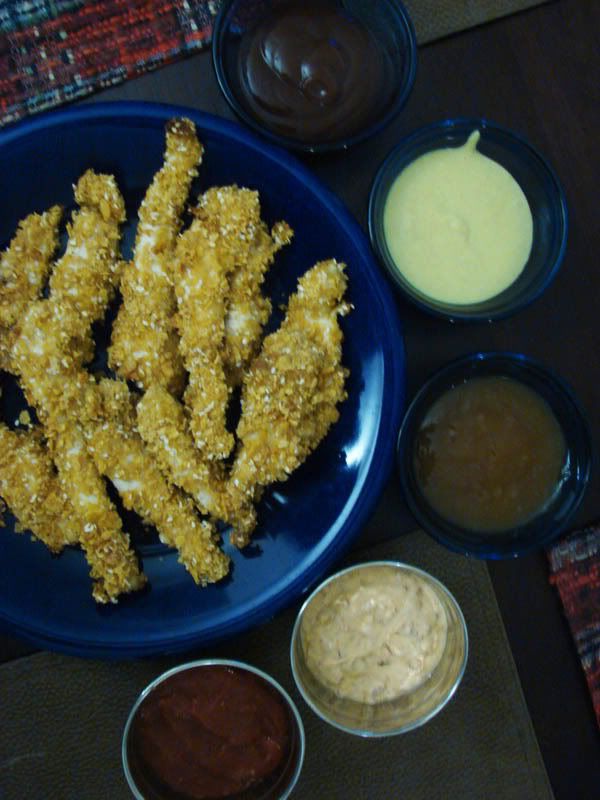
Chicken Strips and 5 Dips!
Friday Night was chicken strip night! I made a bunch of Ellie Krieger's chicken strips again, and Jack made a variety of sauces for dipping them in. He also made some awesome Bloody Marys, and we watched movies. It was a nice night!

The dips, from top to bottom:
Sweet Baby Rays Barbecue Sauce, Horseradish Honey Mustard Sauce, Sweet & Sour Sauce, Chipotle Yogurt Sauce, Cocktail Sauce.
Here are the dip recipes, via Jack, minus the chipotle yogurt sauce, which was just Greek yogurt with finely chopped chipotles in adobo sauce mixed in to taste, and the Sweet Baby Rays, which is from a bottle:
As for the Bloody Marys...

Jack garnished them with a rim of celery salt and green olives skewered won a thin spear of celery. Yum! If only we had known about Brownie Points' bacon vodka (thanks Alanna!). That would have made a great addition to this cocktail. Oh well. Here is the Bloody Mary recipe:
Now THAT's a good Friday night, people!
The dips, from top to bottom:
Sweet Baby Rays Barbecue Sauce, Horseradish Honey Mustard Sauce, Sweet & Sour Sauce, Chipotle Yogurt Sauce, Cocktail Sauce.
Here are the dip recipes, via Jack, minus the chipotle yogurt sauce, which was just Greek yogurt with finely chopped chipotles in adobo sauce mixed in to taste, and the Sweet Baby Rays, which is from a bottle:
Horseradish Honey Mustard Sauce
Ingredients
¼ cup Greek yogurt (or drained yogurt)
¼ cup yellow, Dijon , or stone-ground mustard (or mixture)
¼ cup honey
1 tbsp. prepared horseradish
¼ tsp. white pepper
Mix all ingredients. Adjust for heat and/or sweetness as desired. Cool and serve.
Sweet and Sour Sauce
Ingredients
¼ cup apple cider vinegar
¼ cup brown sugar
½ cup pineapple juice
1 thumb-sized piece of ginger, peeled and sliced
2 cloves garlic, peeled and sliced
1 tbsp corn starch
Cayenne or ground red pepper (optional)
In a small container, mix the corn starch with enough pineapple juice to dissolve. In a saucepan, heat the vinegar, brown sugar, and the rest of the pineapple juice. Add the ginger, garlic and cayenne (optional) and boil for up to 2-3 minutes. While boiling, add the corn starch/juice mixture and stir until thickened. Cool and serve.
Cocktail Sauce
Ingredients
½ cup catsup (ketchup works just as well)
1 tbsp prepared horseradish
1 tbsp Worcestershire sauce
1 tbsp hot pepper sauce
Mix all ingredients. Adjust flavor as desired. Cool and serve.
As for the Bloody Marys...
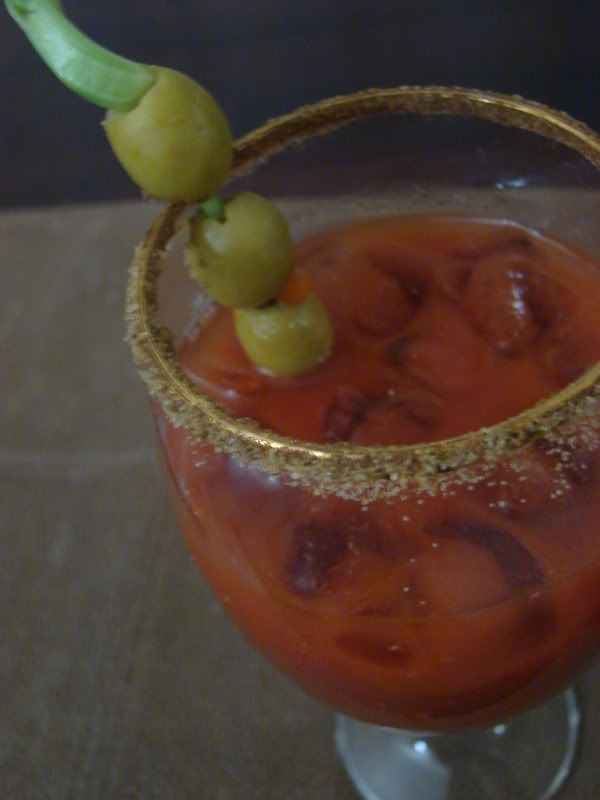
Jack garnished them with a rim of celery salt and green olives skewered won a thin spear of celery. Yum! If only we had known about Brownie Points' bacon vodka (thanks Alanna!). That would have made a great addition to this cocktail. Oh well. Here is the Bloody Mary recipe:
Jack's Bloody Mary Mix
Ingredients
4 cups vegetable juice (V-8 or equivalent)
2 tbsp prepared horseradish
4 tbsp Worcestershire sauce
hot pepper sauce to taste
1 tsp white pepper
1 tsp celery salt
Mix all ingredients. Adjust flavor as desired. (and add vodka to your taste, of course. We added 2 oz. of vodka to drinking glasses filled a little more than halfway with ice, then filled the rest with the Bloody Mary mix and stirred. You could also shake it and strain out the ice.)
Now THAT's a good Friday night, people!
Wednesday, January 16, 2008
not just leftovers
Lest you think I've been sitting on my haunches, not cooking or eating since the weekend, please take another look at my Bittman's Pernil post, where I have been adding my creations using the leftover pork roast. Wow! Pork roast is versatile and fun!
I think this is the kind of cooking I love most. Although I enjoy learning classic preparations and techniques, nights when I am cleaning out the fridge and the pantry are a fun-tastic creative challenge for me. To me, this is the best thing about cooking...experimenting with flavors and textures and ways of cooking. I am not intimidated because I'm not following some specific recipe and I am not worrying about wasting expensive ingredients. I'm just taking inventory of what's on the shelves and putting stuff together in ways that seem like good ideas. Sometimes it's not a complete success, but very rarely is this kind of cooking a complete failure.
Check out this post on Ruhlman's Elements of Cooking blog about recipes. I love the recipe example he uses, with directions such as "add a bunch of herbs." The point being, you don't necessarily need a recipe to cook a good meal. Go by taste. Go by feeling. Go by instinct. Don't be afraid to add or subtract. Don't panic if you forgot to by an ingredient. Improvise! Learn! Discover!
Monday, January 14, 2008
Bittman's Pernil
Yesterday I made Mark Bittman's Pork Pernil. It's an easy recipe, but cooks pretty much all day. I had a big pork picnic roast, and it just sat in the oven and cooked away for 5 hours or so. The results? Delicious, rich, tender, stick to your teeth pork. Warning, The whole onion in a food processor thing is heck on the eyes, and we had to open all the windows as the pork first went into the oven...very strong. Of course, the onions became a dark, sticky sweet flavoring for the pork as time went on, so it was worth the tears and briefly cold home.
Recipe: Pernil
Time: At least 3 hours
1 pork shoulder, 4 to 7 pounds (or use fresh ham)
4 or more cloves garlic, peeled
1 large onion, quartered
2 tablespoons fresh oregano leaves or 1 tablespoon dried oregano
1 tablespoon ground cumin
1 teaspoon ancho or other mild chili powder
1 tablespoon salt
2 teaspoons freshly ground black pepper
Olive oil as needed
1 tablespoon wine or cider vinegar
Lime wedges for serving.
1. Heat oven to 300 degrees. Score meat's skin with a sharp knife, making a cross-hatch pattern. Pulse garlic, onion, oregano, cumin, chili, salt and pepper together in a food processor, adding oil in a drizzle and scraping down sides as necessary, until mixture is pasty. (Alternatively, mash ingredients in a mortar and pestle.) Blend in the vinegar.
2. Rub this mixture well into pork, getting it into every nook and cranny. Put pork in a roasting pan and film bottom with water. Roast pork for several hours (a 4-pound shoulder may be done in 3 hours), turning every hour or so and adding more water as necessary, until meat is very tender. Finish roasting with the skin side up until crisp, raising heat at end of cooking if necessary.
3. Let meat rest for 10 to 15 minutes before cutting it up; meat should be so tender that cutting it into uniform slices is almost impossible; rather, whack it up into chunks. Serve with lime.
Yield: At least 6 servings.
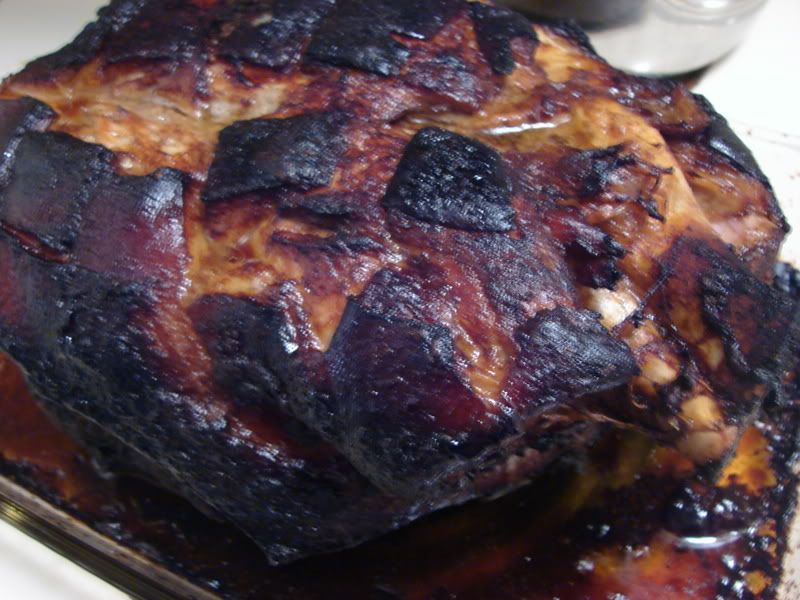
It looks really dark, but it wasn't burnt tasting at all. In fact, that skin part was Heaven right out of the oven...it got too chewy to eat once cooled, though :(
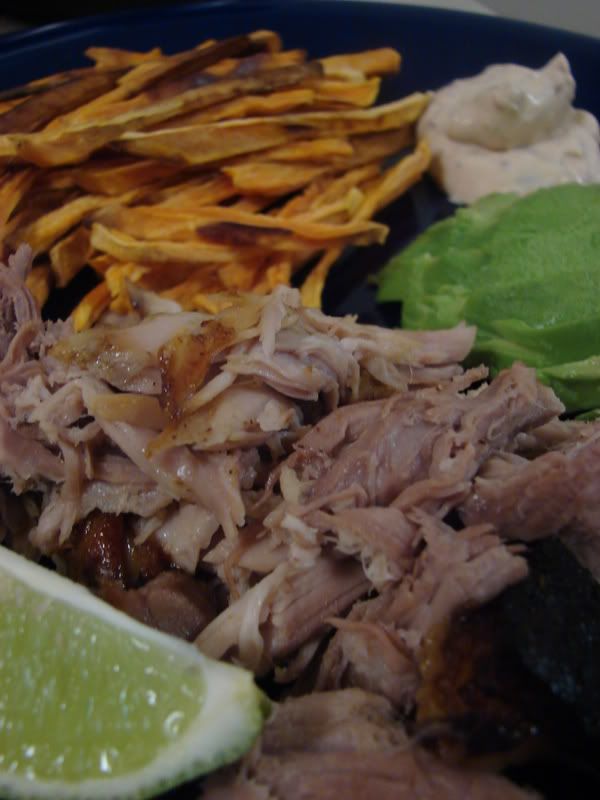
Although I could probably just eat a big plate of this pork, I decided to make some sweet potato oven fries to go along with it. I've never been able to get crisp sweet potato fries in the oven, but I saw this recipe from Molly Katzen on Serious eats, and thought I'd give the method a try. Basically, there are two tricks...really thin fries and some time in a low oven...It worked pretty well...most were crisp, but those that weren't were kinda tough. I mixed some canned chipotles into some light sour cream as a dipping sauce...chipotles and sweet potatoes are one of my all-time favorite flavor combos. To add some green to the meal, I simply sliced up some lovely ripe avocados.
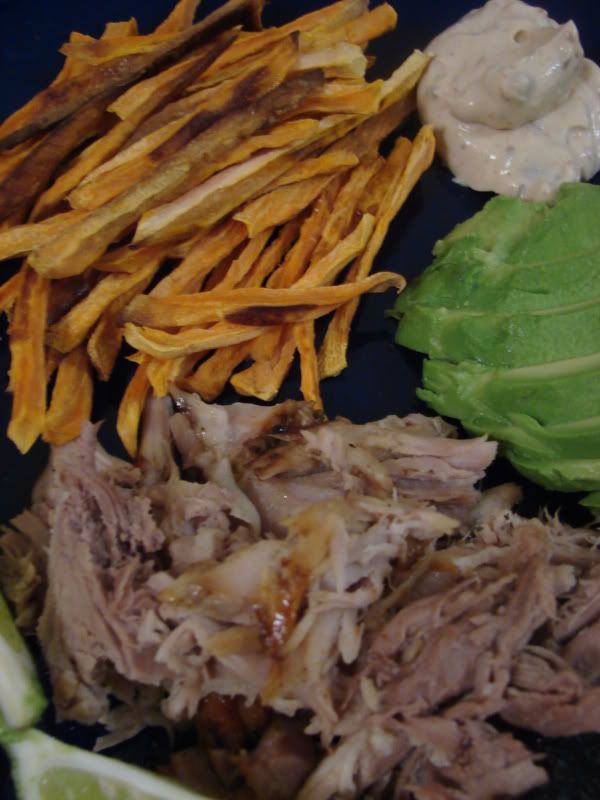
And yes, we have leftover pork for weeks...
EDITED: Speaking of leftover, here's what I did with some last night:
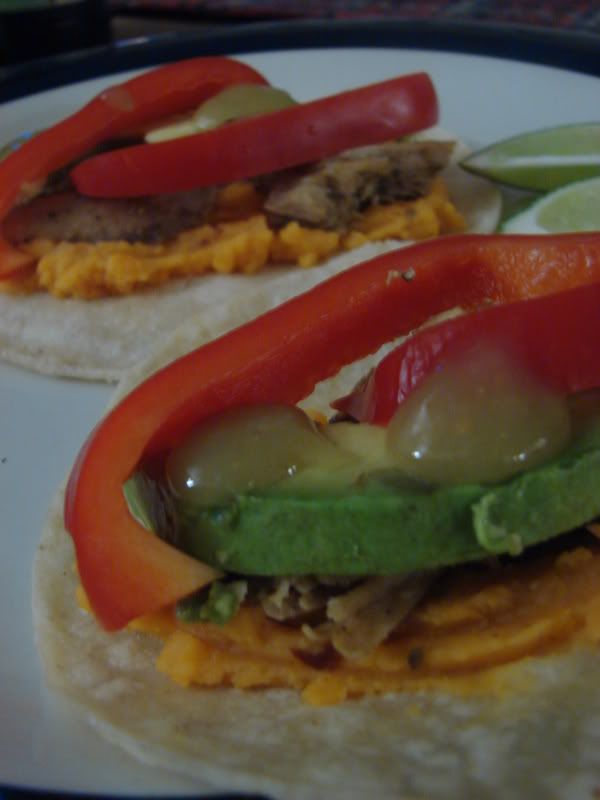
I had a baggie of sweet potato scraps, because cutting the skinny fries was kinda hard and there were a lot of rejects. I boiled those and mashed them with some of the chipotle sour cream. spread the mixture on a corn tortilla, added warmed up pork along with some fixin's and had a really lovely tacos! Mashed sweet potatoes on tacos? YES!!
EDITED AGAIN: More leftovers! This time I made sort of...toastada?

I fried up some corn tortillas, topped them with cheese, seasoned black beans and the pork and put them in the oven until the cheese was all melted. Topped it with green salsa and lime juice. Crunch cheesy porky goodness!
ONE LAST TIME EDIT: The last of it! That's right, I just used up the last of my leftover pernil! I kinda thought it would last longer, but there must have been some random snacking from the fridge here and there *ahem*...anyway, I whipped up a curry with it tonight.
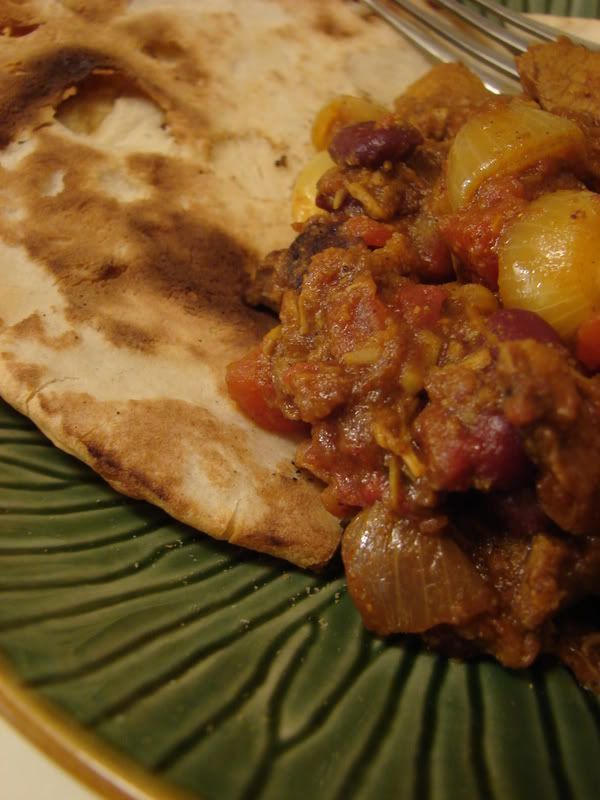
No recipe, of course...that's how it goes when I decide to make a curry with leftovers and pantry items. I started with sauteeing grated fresh ginger and garlic, diced shallots, halved pearl onions and thinly sliced green chili in oil, then once that started to soften I started dumping in lots of spices, before adding the pork. Lots of curry powder, some turmeric, ground ginger, ground clove, cinnamon, chili powder, garlic powder, onion powder, fresh black pepper, red pepper flakes, more curry powder more cinnamon and so on. I just kept tasting and adding. I also put in a can of diced tomatoes, with juices, and some canned kidney beans, as those were the only legumes I had on hand. Also a good squirt or two of honey. When I needed more liquid for it to simmer, I poured some of the Leinenenkugels Sunset wheat beer that was keeping me company. It's flavored with orange and cardamom, so the flavors meshed well. That's about it, I think...oh, some rice vinegar got put in there because it was missing a bit of twang. It's good. A nice, almost fruity and floral sweetness at first, followed by the slow heat.
The end of my pork pernil. the end of an era?
Saturday, January 12, 2008
The Bobs are Winners!
For our office post holiday party (the actual holidays are always too busy to plan a party), we had a dip contest. I loved this idea, but I have made very few dips. I didn't know where to start. Googling "dips" led to numerous results, but most were your usual artichoke, taco, nacho and such dips. Which are all good. But this was a contest! I needed something that stood out...something different, but still crowd-pleasing.
I put a plea out to all my non-work friends for any ideas they had. I got some good ideas that I will probably try in the future. But there was one that stood out. It was a suggestion from a friend in Denver, who had had this dip at a restaurant there called the Irish Snug. It's a warm blue cheese dip with garlic and bacon. To me, that sounded like a sure winner.
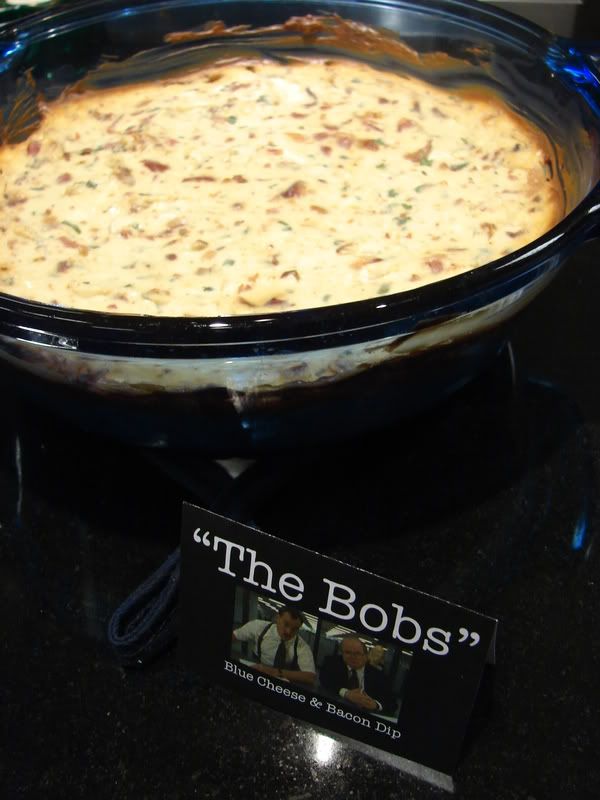
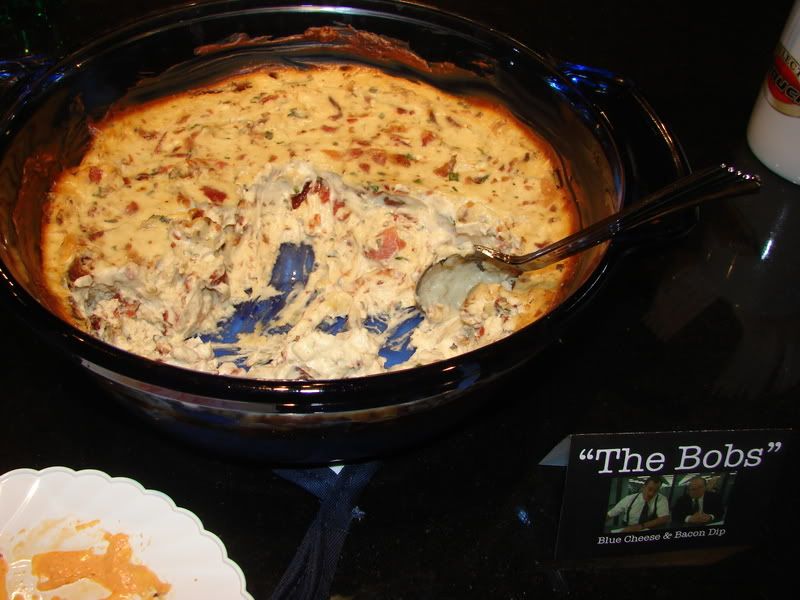
Dip contest entrants were encouraged to give their dip a fun name. I went with "The Bobs," a reference to Office Space. There were 6 other dips, and it was a fun contest. In the end, it came to a tie between "The Bobs" and "Harry Cheese", which was cream cheese mixed with Harry & David's Pepper & Onion Relish, which, despite the over-easy nature of it, is a really yummy dip. But the tie breaking vote went to the Bobs! Yay!!
Here is the recipe (which I doubled):
The Bobs
(Warm Blue Cheese Dip with Garlic and Bacon)
Yields: 14 servings
7 slices bacon
2 cloves garlic, peeled and minced
1 (8 ounce) package cream cheese, softened
1/4 cup half-and-half
4 ounces blue cheese, crumbled
2 tablespoons chopped fresh chives
1. Place bacon in a large, deep skillet. Cook over medium high heat until evenly brown. Remove bacon from skillet, drain on paper towels and crumble.
2. Place garlic in hot bacon grease. Cook and stir until soft, about 1 minute. Remove from heat.
3. Preheat oven to 350 degrees F (175 degrees C). Place cream cheese and half-and-half in a medium bowl. Beat with an electric mixer until blended. Stir in bacon, garlic, blue cheese and chives. Transfer mixture to a medium baking dish.
4. Bake covered in the preheated oven 30 minutes, or until lightly browned.
Wednesday, January 09, 2008
Tuesday, January 08, 2008
chicken fingers and peanut sauce
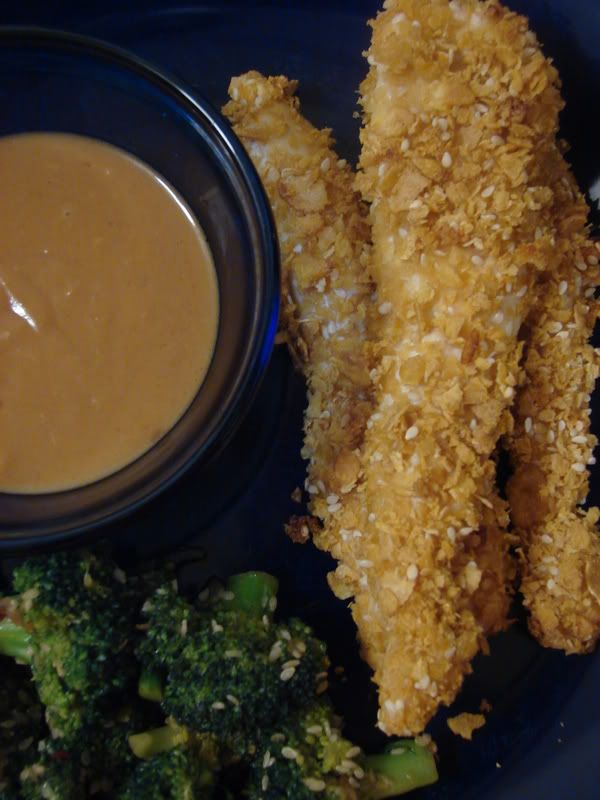
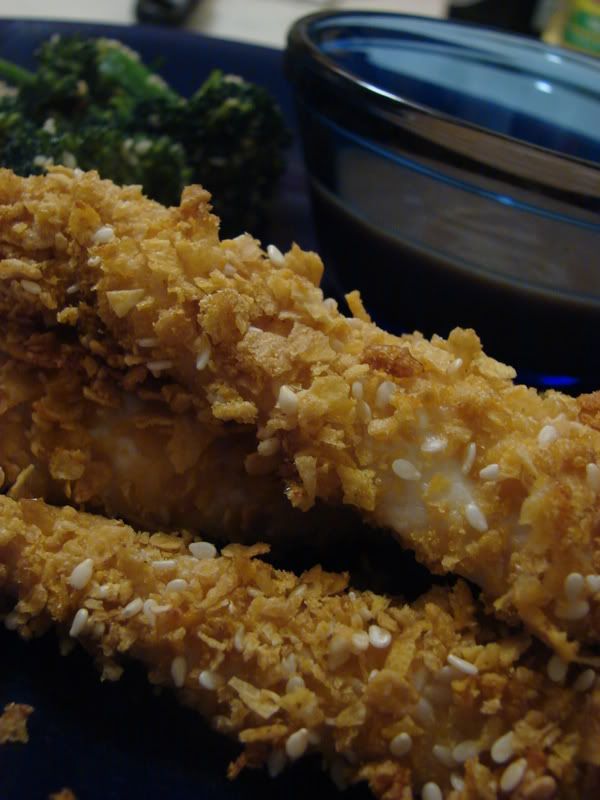
Last night for dinner I made Ellie Kreiger's Crispy Chicken fingers from her book The Food You Crave, as featured on Serious Eats. I had made a couple recipes before of Ellie's...The fried chicken and collard greens...after seeing one of her shows on the Food Network. We like the fried chicken, and these strips looked pretty similar. It seemed it would make a nice, comforting, quick and healthy meal. Once at the grocery store, however, I decided to nix her honey mustard sauce and whip up some spicy peanut dipping sauce instead. And for a veg I decided on broccoli stir-fried with ginger, garlic and sesame.
Recipes for the Chicken fingers (direct from the book via Serious Eats), peanut sauce and broccoli follow. Keep in mind that this is the kind of cooking you do to taste, so use my recipes as a guide, but feel free to add, subtract, veer off...
Chicken Fingers
1 1/4 pounds boneless, skinless chicken breast halves, cut across into 1/2-inch-thick slices
1/2 cup lowfat buttermilk (I added some soy sauce to my buttermilk...don't know if that made a ton of difference or not)
Cooking spray (I just used vegetable oil wiped on the pan with a paper towel...)
4 cups whole-grain corn cereal such as Corn Chex or corn flakes (I added sesame seeds as well...)
1/4 teaspoon salt Pinch of freshly ground black pepper (I put in about 1 tsp. of white pepper instead of black)
Procedure
1. Preheat the oven to 400°F.
2. Combine the chicken and buttermilk in a shallow dish. turning the chicken to coat it with the buttermilk. Cover and chill for 15 minutes. Coat two baking sheets with cooking spray.
3. Put the cereal in a sealable plastic bag and crush with a rolling pin.
4. Transfer the crumbs to a shallow dish and season them with the salt and pepper. Dip each piece of chicken in the cereal to fully coat and arrange on the prepared baking sheets. Bake until cooked through, about 8 minutes. Leave the chicken on the baking sheets to cool slightly. It will become crispier.
Peanut Dipping Sauce
1/3 cup creamy peanut butter
3 Tbsp. honey
1 tsp. fresh grated ginger
1/2 tsp. fresh grated garlic
1 tsp. chili hot oil
1/2 tsp. sesame oil
1 Tbsp. soy sauce
1 tsp. rice wine vinegar
1/2 tsp. fish sauce
1/2 tsp. red pepper flakes
water to thin out...approx. 4 Tbsp.
Mix everything but the water together. add water a little at a time, stirring until sauce reaches your desired consistency.
Sesame Ginger Broccoli
3 cups broccoli florets, blanched
about 3 tbsp. vegetable oil
1 tbsp chili hot oil with some of the flakes
1 tbsp. fresh grated ginger
2 tsp. fresh grated garlic
1 shallot, sliced thin
4 tbsp. sesame seeds
4 tbsp. soy sauce
dash of fish sauce
cook shallots and garlic in oil until translucent, add ginger, hot chili oil and sesame oil and sesame seeds, cook for a couple minutes, then add broccoli and stir-fry for about a minute before adding soy and fish sauces and cooking for another couple of minutes.
Monday, January 07, 2008
welcome to moe's
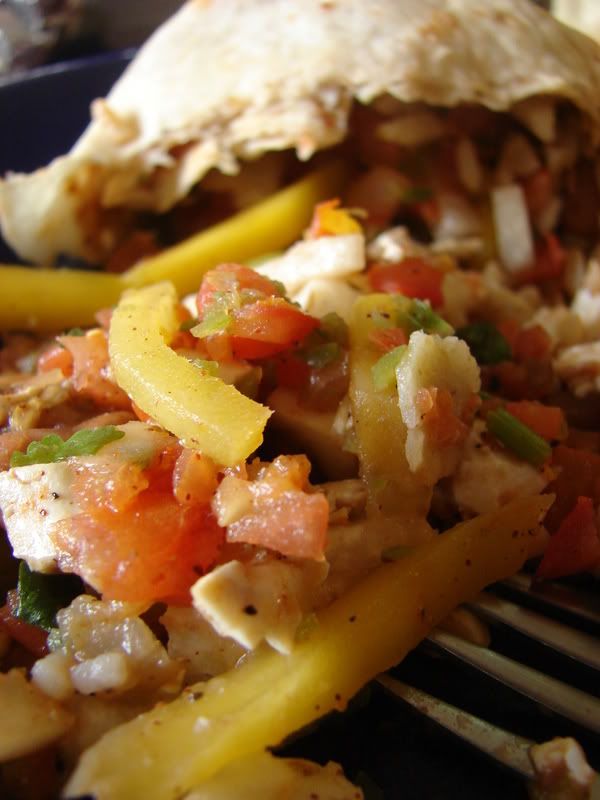
It seems that just about every Sunday we get a hankering for lunch from Moe's Southwest grill. This is the kind of chain I like. I am a sucker for giant burritos...and there's a plethora of burritos places popping up these days. Moe's seems to be our current favorite, though. The food is fresh and customizable and huge and tasty. I always go for a burrito, while Jack opts for steak nachos. Yesterday I got a "Joey Bag of Donuts" burrito, on which I opted for pinto bean, rice and tofu. Yes, I'm weird, I really like tofu. I actually crave the stuff. I skipped cheese, because there is so much going on it gets lost, and is not worth the extra fat and calories. I got my usual pico de gallo, fresh minced jalapeno and cilantro, then noticed a couple of new topping offerings. Mango and Jicama! I love mango! I love Jicama! Yay! So I added them both to my "bag of donuts." They both added a nice sweetness, and the jicama added great crunch. Jicama is my favorite veggie right now. It's flavor is sweet and it is so crisp. I need to keep some raw sticks of it in my fridge at all times to snack on, kind of like Alanna's sugar snap pea idea.
What endears me to Moe's is the pop culture references. Most of the menu items are named after somewhat obscure references to various televisions shows and movies, such as Seinfeld, Fletch and My Cousin Vinnie. It makes things fun for trivia geeks like Jack and I. Unfortunately, they've changed some of the names since we first started going. You can see all the current menu item names and past ones and what the reference on the Wikipedia entry for Moe's. As you can see, you can no longer order an Ugly Naked Guy. Dammit!
Anyway, Here are some of my favorite Moe's menu items, with links to video clips about what they are referencing:
Triple Lindy
Art Vandalay
Ruprict
John Coctostan
Ha! Ah...good times.
Friday, January 04, 2008
clearing kitchen stadium
You may not know this about the Iron Stef, but I operate out of a small 2-bedroom apartment. Such apartments aren't known for their kitchens. Mine is no exception. While it is a nice size kitchen, square food-wise, counter and pantry space is lacking. We've been here for almost 2 years. We tend to treat apartments like temporary homes...and we just put up with the lack of storage and workspace. But after getting my pretty new Le Creuset and getting Jack a nice new Wustof knife, I decided some kind of upgrade was necessary. It was about friggin time. And it ended up being quite cheap and easy.

I got these chrome storage shelves at a big box hardware store. The big one was $56 and the smaller one was $33. The wine rack/ stemware attachment, which I think is brilliant, was only $20! These may be lowly garage-type storage, but I like the open, clean, chrome look. It's a smart look, I think, and it requires us to keep things orderly. They are ultra sturdy as well, and need no tools to build.
I would show before photos, but that would be embarrassing. We had resorted to piles in corners. The cookbooks were all hidden away in the living room in a pile, and the wine lived on the kitchen floor. Not cute.

My favorite change is the gain in counter space. The microwave used to sit on the end there where you see the coffee-maker. That's like 2 extra square feet of workspace! Yay!!
I still want to do some more as far as storage and organization. I'd like to make a magnetic spice rack, similar to this, and Jack is looking into building a magnetic knife strip. Although knife strips are widely available, Jack wants a nice wood one that won't threaten to scratch knives, and it shouldn't be hard to make.
Have any simple, frugal kitchen improvement/storage/organization tips? Share them with us!
Tuesday, January 01, 2008
new years fish tacos
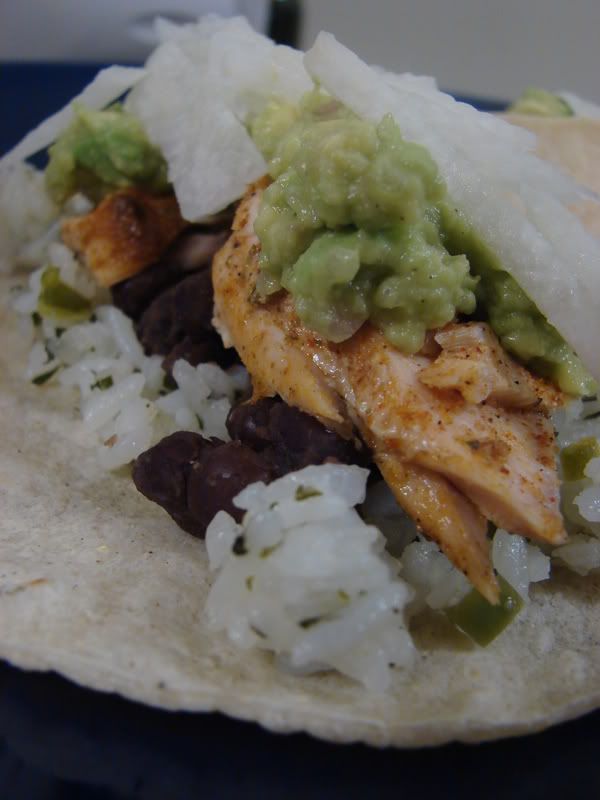
Instead of braving the cold, windy, impaired driver-filled streets, Jack and I stayed home for New Years Eve. We're both a little under the weather, so it was for the best. We made fish tacos and watched the No Reservations marathon. It was nice. And the tacos were amazing.
Here is the spread:
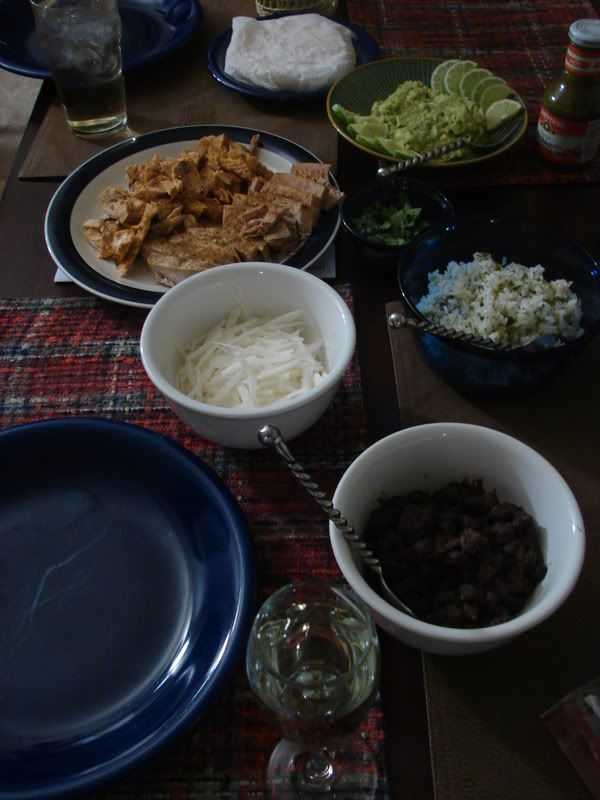
For the tacos I made jalapeno cilantro rice, which is basically white rice mixed with almost a whole bunch of chopped cilantro and 4 jalapeno peppers chopped fine, moistened with a bit of lime juice. Jack made a simple guacamole with2 avocados, 1 clove of grated garlic and one finely chopped shallot, along with salt, pepper and lime juice. We also had some black beans, from a can, and flavored with cumin, garlic, red pepper flakes, salt and pepper. For accompaniments We had julienned jicama, green salsa, cilantro and limes.
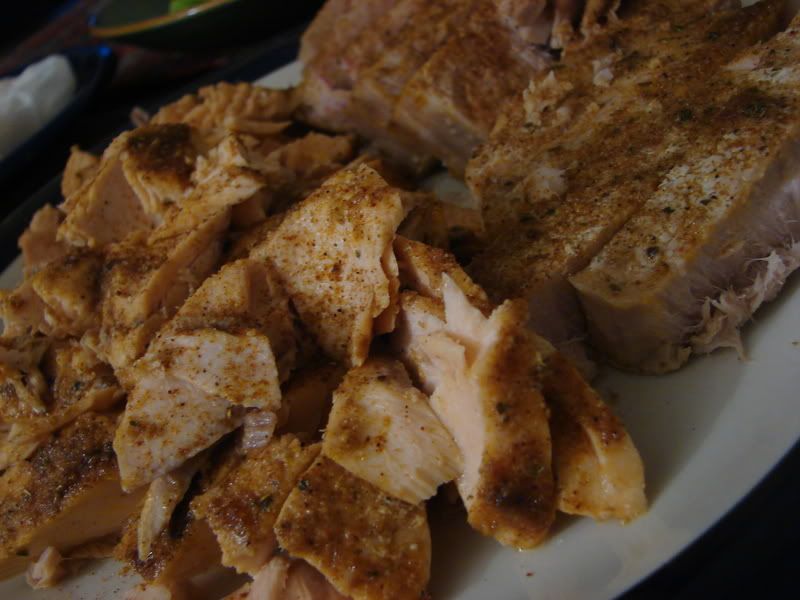
Jack cooked the fish, two salmon steaks and two tuna steaks, with the following blend of spices:
1/2 tsp. granulated garlic
1/2 tsp. kosher salt
1/2 tsp. sugar
1/2 tsp. paprika
1/2 tsp. cumin
1/2 tsp. Mexican oregano (measured then ground)
1/4 tsp. cayenne pepper
1/8 tsp. white pepper
He cooked them in a 400 degree oven for approx. 5 minutes, then placed them under the broiler for another few minutes.
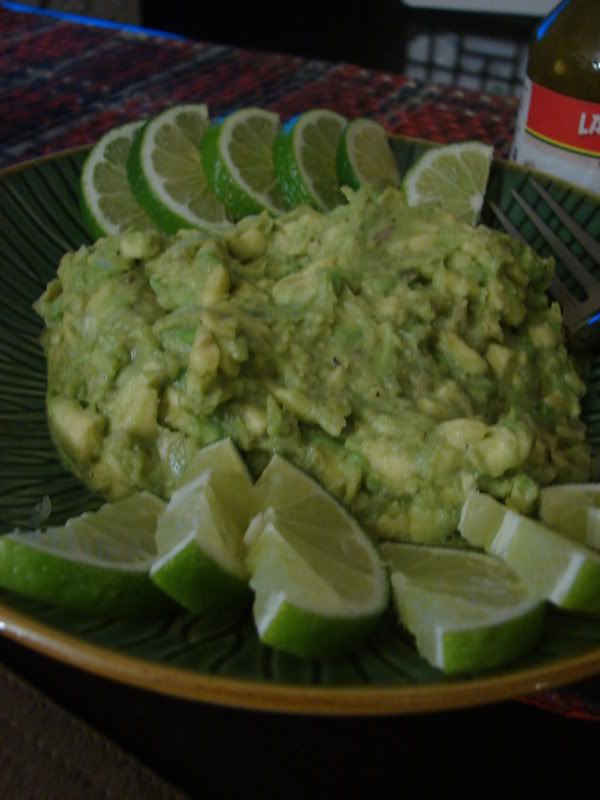
The guac.
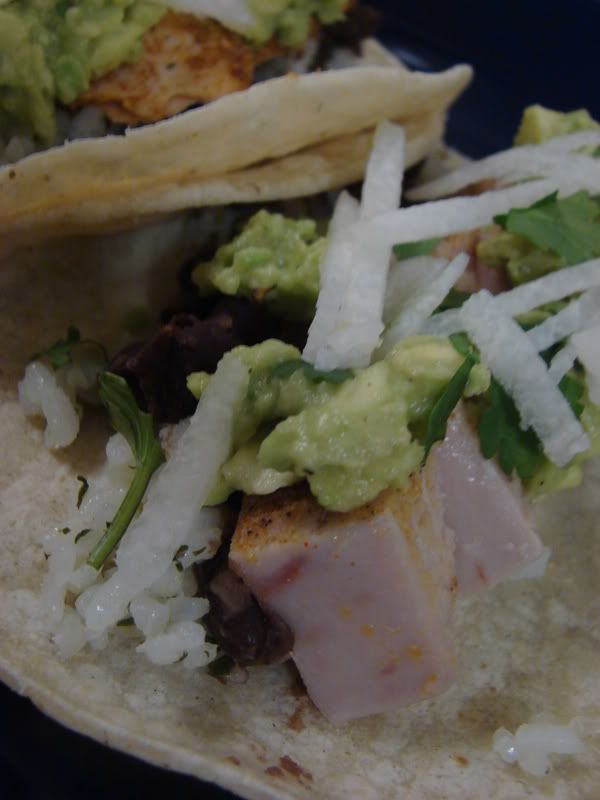
mmmmmm...fish tacos!!
a great way to usher out the year and welcome the new one. Have a great New Year, everybody!
Subscribe to:
Posts (Atom)